Third-Party Integrations
It is possible to integrate the Cleverbridge platform with a variety of third-party applications. The following describes how to integrate with the most relevant applications in different fields.
Sales
Integrating a customer relationship management (CRM) platform enables you to seamlessly import and synchronize your customers' data from/with the Cleverbridge platform. The integration also allows you to automate your sales workflow and provide specifically targeted reporting. You can integrate with the following CRM platform:
Salesforce
ImportantSalesforce Integration via the Commerce Assistant is no longer maintained. To integrate Salesforce with our subscription commerce platform, use our Two-Way Salesforce Integration below.
Cleverbridge offers integration support for Salesforce, the leading customer relationship management (CRM) platform for sales, service, and marketing.
Two-Way Salesforce Integration
Our Integration Services allow B2B companies to automate their sales so that their sales reps become more efficient and can focus on higher-value selling. They sync customer data in real-time bi-directionally between Salesforce and our subscription commerce platform.
ExampleHere are a few examples of what you can achieve with the integration:
- Create and update lead, contact, account, order, quote, and opportunity data in Salesforce based on transactions processed in our subscription commerce platform
- Populate and process carts directly from Salesforce transaction objects such as Opportunities, Quotes, and Orders
- Integrate with Salesforce CPQ for a seamless online buying experience for your customers
- Create and manage subscribers and subscriber lists in Salesforce Marketing Cloud based on changes made in our subscription commerce platform

The integration consists of two easy steps:
- Cleverbridge sets up Integration Services for you, which includes connecting your Salesforce account with your Cleverbridge account and choosing a usage scenario.
- You get access to TIBCO Scribe® Online, where you can map Salesforce entities/fields to Cleverbridge entities/fields and vice versa. For this part of the integration, documentation is available at Cleverbridge Connector for TIBCO Scribe® Online under https://help.scribesoft.com/scribe/en/index.htm#sol/conn/cleverbridge.htm.
For more information on our subscription commerce platform and its Salesforce integration, contact Client Experience.
Quote-to-Cart in Salesforce
NoteQuote-to-Cart is one example how you can integrate your Salesforce instance with our subscription commerce platform. The integration relies on the highly flexible Cleverbridge Connector for TIBCO Scribe® Online and can be adapted based on your requirements. The connector also supports other CRM systems, such as Netsuite, Microsoft Dynamics, or SugarCRM. For more information, contact Client Experience.
With just one click in Salesforce, your sales reps can now instantly generate and send personalized, pre-populated checkout pages for their customers to complete transactions. Both B2B and B2C customers only have to add their payment details to the checkout pages to execute the transactions, saving each rep valuable selling time. To learn how to do this in Salesforce Quotes, watch the following video:
Not in the mood to watch a video? Here is the same content as a classic doc:
What is Quote-to-Cart?
Quote-to-Cart is a self-service global storefront seamlessly integrated with Salesforce. It extends the standard quote or CPQ functionality of Salesforce with our shopping cart and payments solutions. Your sales reps can quickly configure a customized price quote and automatically send it to the customer to complete their purchase. This automates the final part of the sales process and reduces the time and resources needed to move customers from click to close. In addition, Quote-to-Cart offers the following:
- It creates and updates records in Salesforce, for example, it closes an opportunity or updates the account with new contact information.
- It allows your sales team to accept a variety of payment methods to meet the unique needs of business buyers.
- Your sales reps receive a notification when a customer order is processed.
NoteYou can set up rules in Salesforce for which orders go through quote-to-cart or a manual process, for example, all orders over 10,000 USD go through a manual process.
Why Should You Use Quote-to-Cart?
There are three main reasons why you should integrate your quoting system with Cleverbridge Quote-to-Cart:
Eliminate Manual Work
Are you relying heavily on your sales team to drive renewals via a manual quote process? This is problematic because it costs you X dollars to generate and process each quote. With an automated online process, you will generate, issue, and process thousands of quotes for your business customers every month — without that X dollar per-quote cost eating into your profits.
Improve Salesperson Productivity
If you implement Quote-to-Cart, customers that renew their subscriptions without sales assistance will increase significantly, thus reducing retention costs and increasing efficiency. You will save hours per month per sales representative, freeing up sales and renewal teams to focus on building customer relationships and higher-value selling.
Complete Sales Faster
Many B2B companies are searching for a way to quickly finish the transaction, collect payment, and update customer records within their CRM. Quote-to-Cart cuts down on time and resources when taking your customers from click to close. Your customers can complete transactions faster, and you will be paid faster.
How Quote-to-Cart Works
Before your sales reps can generate and send an email with a personalized link to a pre-populated checkout page, they must set up a few things in Salesforce:
- The Account and Contact to whom they want to send the quote.
- An Opportunity to which the quote relates.
- The Product, including pricing, that they want to offer to the customer.
Step 1: Your Sales Rep Creates a Quote in Salesforce
To create a quote in Salesforce, your sales rep should do the following:
- Click New Quote at the opportunity level. Some fields are already filled in with values from the opportunity, for example, opportunity and account name.
- If no products from the opportunity were copied to the quote, add products as line items (products) to the quote.
- Enter additional details, such as the quote name or expiration date, select the checkbox Generate Cleverbridge URL, and save your changes.
- Change the quote's status from Draft to Approved and click Save.
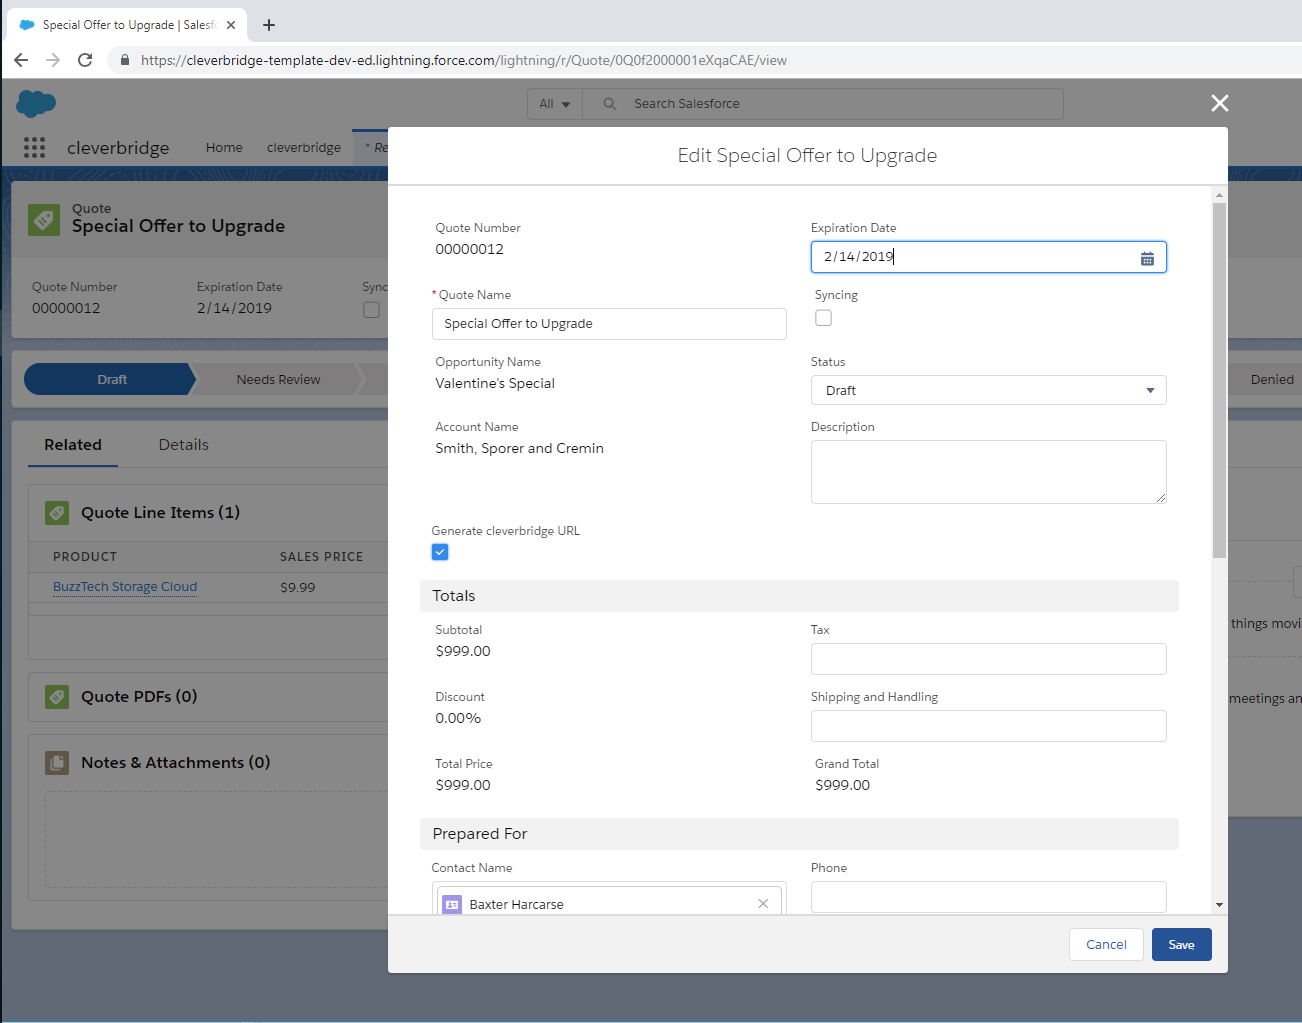
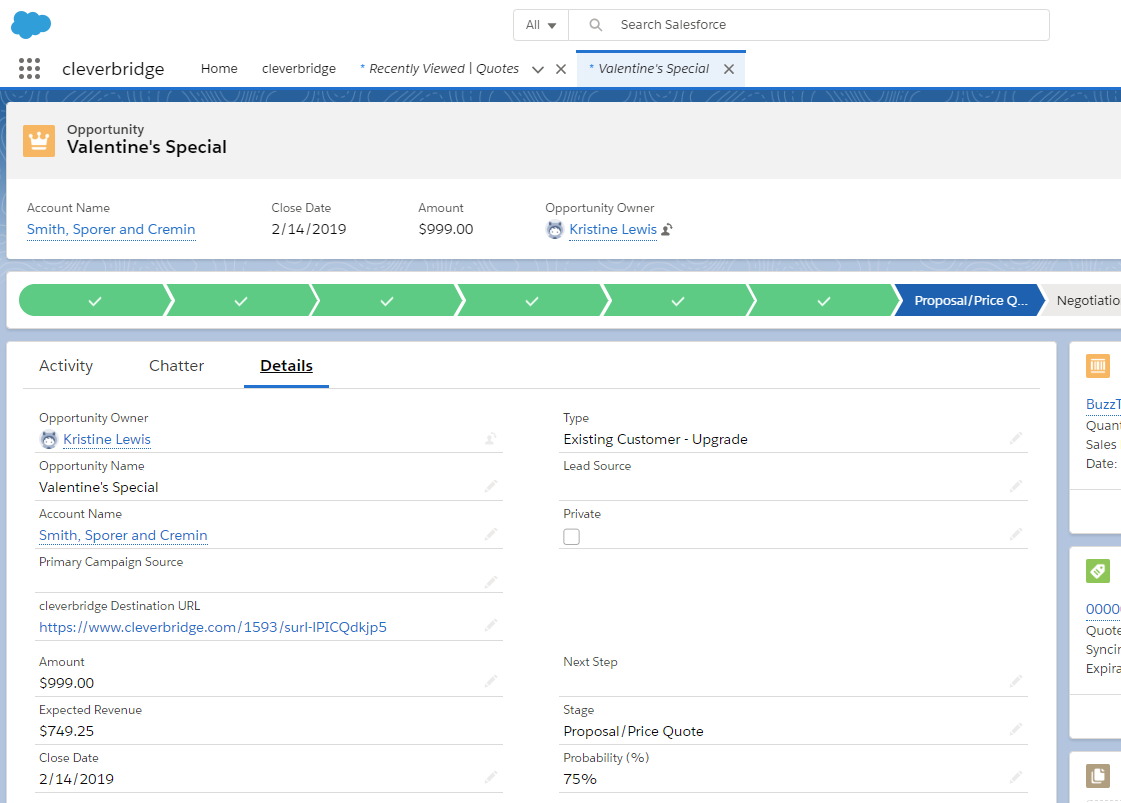
Salesforce generates and sends an email to your customer, which contains a link to a personalized, pre-populated checkout page. The link is saved under the opportunity as the cleverbridge Destination URL.
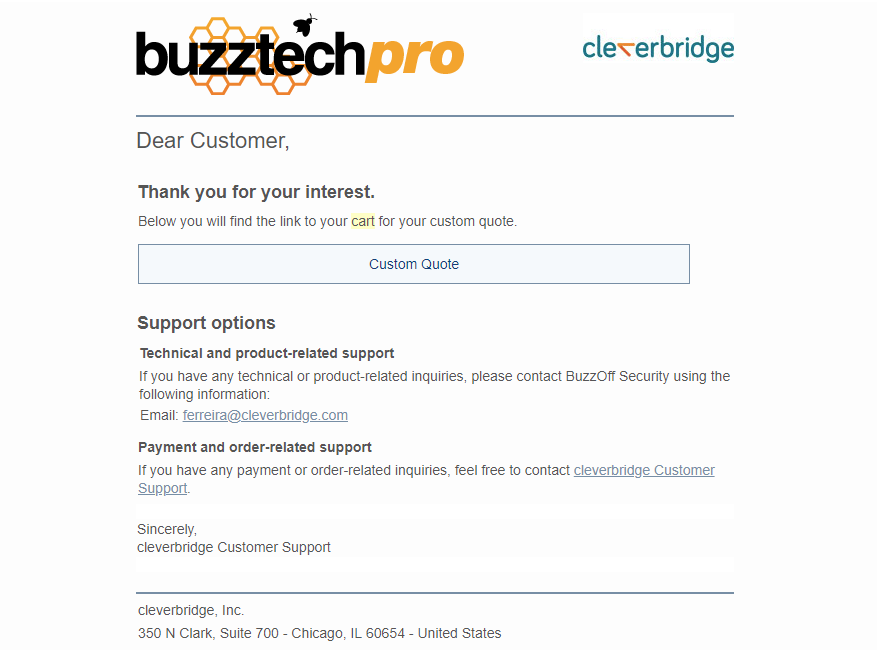
Step 2: The Customer Receives an Email
Your customer receives an email with a personalized link. The link takes them to a Cleverbridge-hosted checkout page where they can complete the purchase. Layout and text of the quote email are customizable.
Step 3: The Customer Completes the Purchase
To complete the purchase, your customer must simply enter their payment details on the checkout page. All the other information, namely product, pricing, and customer contact information, is preloaded.

Our highly customizable checkout pages provide out-of-the-box functionality, such as volume discounts, global payment methods and currencies, or localization. For more information, see Checkout Guide.
Tips
- If you don't want customers to add cross-sells or change the order quantity, you can lock the checkout page.
- You can give customers the option to automatically renew their subscription, which means more recurring revenue for your business.
- If the customer has transacted through Cleverbridge before, the payment method can be preselected or prefilled based on what they used last time.
When the customer clicks Buy Now on the review page, Cleverbridge processes the order.
Step 4: Cleverbridge Processes the Order
Finally, Cleverbridge takes over and processes the order:
- Cleverbridge collects funds from the customer and, later on, disburses them to you.
- You are informed about the successful purchase through a PaidOrderNotification.
- Depending on the payment method, your customer directly receives their product and an invoice or an order confirmation.
In Salesforce, the following records are automatically updated:
- The opportunity is closed, with the stage Closed Won or Closed Paid, and the close date is set. Optionally, a new opportunity is created for the next renewal of the subscription.
- The account is updated with information that the customer changed or entered on the checkout page, for example, their phone number.
- The status of the quote changes to Accepted.
NoteThe individual setup of your Salesforce instance and the rules that have been set in place also determine which records and fields are updated.
TIBCO Scribe
You can use our TIBCO scribe connector to integrate data into lead, contact, account, and opportunity data in CRM systems or create subscribers and manage subscriber lists in marketing systems.
For more information, see the Cleverbridge Connector For TIBCO Scribe® Online.
Marketing
Integrating a partner management platform enables you to analyze and monitor your digital campaigns in a cost and time-effective manner. The integration also helps you to plan effective marketing strategies, which allows you to improve your conversion rate and grow your client base. You can integrate with the following partner management platform:
Partnerize
To integrate with Partnerize, with whom we partnered to provide our Performance Marketing Platform, you must set up the following:
Partnerize Integration Cookie
Whenever a publisher has been accepted into your Partnerize campaign to promote your product(s), the publisher receives links to your web page(s) in the Partnerize console. An x-parameter (&x-clickref) is appended to each of these links, and the unique value of this x-parameter is tied to the corresponding publisher (&x-clickref=[unique value]).
To integrate with the Partnerize platform, you need to generate a first-party (.yourdomain.com) cookie that will record the unique value contained in the Partnerize x-parameter. Whenever customers land on your web pages from Partnerize publisher links, you should drop this cookie onto their web browsers. If a customer reaches a Cleverbridge-hosted checkout process and decides to make a purchase, we will attribute the sale to the value saved in the cookie. Then we will make a call to the Partnerize API with the applicable purchase details, including the clickref value.
NoteThis is how Partnerize learns that a publisher drove traffic to your site that resulted in a sale. Partnerize bases their commission calculations on this information.
The cookie that you set up to collect this information should have the following characteristics:
- It only saves the value of the
x-clickref. - It must be named something standard and unique to your company, such as
partnerize_clickref_[yourname]. - It should be set up to expire. It is recommended setting it up to expire 90 days after the time of the first click.
ImportantIf you use multiple ecommerce providers, make sure that all incoming traffic with
&x-clickref=[value]ends up in the Cleverbridge-hosted checkout process.
Partnerize X-Parameters
To enable Cleverbridge to correctly credit the Partnerize publishers who distribute your promotional coupon codes through mailings, print media, web forums, etc., you have to set up x-parameters in the Commerce Assistant that contain the publishers' ID information. Whenever promotional purchases are completed, Cleverbridge uses these x-parameters to trigger API calls, which in turn pass the relevant publisher ID(s) on to the Partnerize platform.
To set up your Partnerize x-parameters, complete the following steps:
- Select Marketing > Promotions in the main menu of the Commerce Assistant.
- Search for and open the promotion your Partnerize publishers are distributing your coupon codes for.
- Select the General tab in the Promotion portal and enter one x-parameter in the X-parameters field. The x-parameter key-value pair must have the following format:
x-publisher-id=<partnerize publisher ID>
Examplex-publisher-id=130l392
NoteAn active integration with a Partnerize campaign is required to use this field.
- (Optional step) To find the Partnerize Publisher ID for a publisher in your Partnerize account, complete the following steps:
a. Click the Partners tab in the main menu of Partnerize.

b. Select Status > Approved as a filter in the left column.
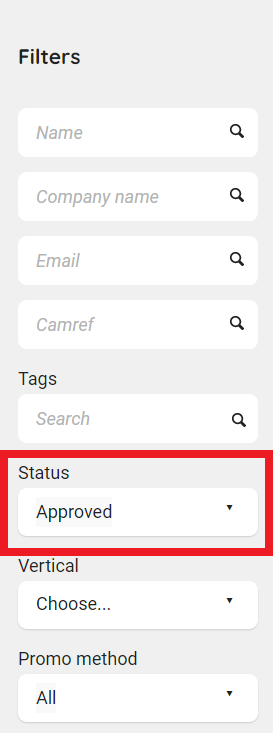
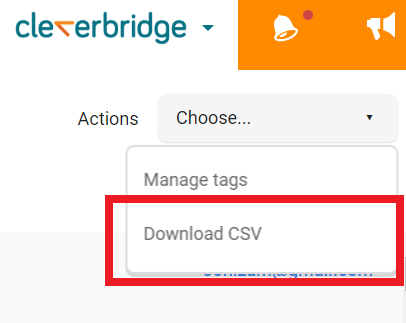
c. Select Download CSV in the Actions drop-down list. A CSV file is downloaded.
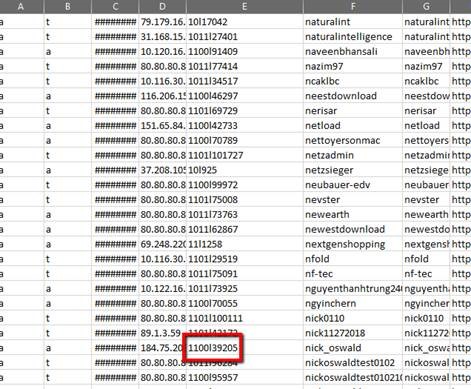
d. Open the CSV file and find the publisher(s) you would like to credit. In column E, you can find their Partnerize Publisher ID.
- Click Save.
For more information about the Partnerize onboarding process, see Partnerize.
Tracking
Tracking tools can help you track user activity and develop a better design for your website. You can also use tracking tools to test your website design and identify trending products. You can integrate your website with any tracking tool using the following tag management platform:
Google Tag Manager
You can use Google Tag Manager (GTM) to manage third-party tracking tools and custom data integrations on your own. As a result, this tool gives you the freedom to trigger your tracking codes on the Cleverbridge checkout pages directly, without having to set up trackings in the Cleverbridge Commerce Assistant.
To integrate the Google Tag Manager with your Cleverbridge checkout pages, do the following:
1. Sign up for a GTM Account
For more information, go to https://tagmanager.google.com/.
2. Ask Cleverbridge to enable the Data Layer required by GTM on your checkout pages
To do so, contact the Client Experience team at [email protected].
3. Set up your GTM tags using the Cleverbridge data Layer and Events
In the following sections, you can learn about Cleverbridge dataLayer, as well as the enhanced e-commerce events that you can consume in your GTM tags:
About the Cleverbridge Data Layer
The Cleverbridge dataLayer is added to every page of your checkout process when GTM is enabled. This dataLayer contains information about the cart, session, user, and transaction, all of which you can dynamically insert in your GTM tags. The dataLayer is activated upon every page load, but it can also contain additional information related to certain events. For more information, see Events and the Cleverbridge data Layer.
Information Available in the Data Layer on Page Load
The following information is available upon every page load of your checkout process if GTM is enabled for your account. The values are inserted dynamically based on the current user session.
dataLayer = [{
  'transactionId': '51142586',  								// the purchase reference ID
  'transactionAffiliation': 'cleverbridge',					    // source of the purchase
  'transactionTotal': 53.95,									// the total of the transaction revenue
  'transactionTax': 8.61,										// the VAT of the transaction
  'transactionShipping': 0, 									// the shipping cost of the transaction
  'transactionCurrency':  'EUR', 								// the transaction currency ID
  'transactionProducts': [{
    'id' : '2417',												// the Cleverbridge product ID
    'sku' : 'my internal sku',									// your internal SKU
    'category' : 'Software', 									// the product category
    'name' : 'Anti-Malware+%5b2+Years%5d',  					// the product name
    'price' : '53.95',  										// the product price, gross or net
    'quantity' : '1' 											// the product item quantity
  }],
  'customerCurrency':  'EUR',									// the transaction currency ID
  'languageCountry': 'en-DE',									// the customer’s locale
  'coupons' : 'OFF50',										    // coupon code (optional)
  'cleverbridgePage' : 'confirmation.successInstantDelivery',	// page name and detail
  'paymentStatus': 'paid ',									    // the status of the purchase (*)
  'random' : 'rmgP9A3fUMNxANgeuHi8',							// a unique hash per session
  'configParameterName' : 'default',							// the value of cfg= parameter
  'paymentType' : 'CCA_VIS ',									// the payment type (*)
  'x-parameter' : [{											// an array of custom x-parameters
    'x-parameter' : 'customValue'
  }]
}];
paymentStatus — Possible values are paid, waiting for payment, quote, or test purchase.
paymentType — For possible values, see Payment Result.
NoteSome fields may have empty values if dynamic values are not available on the current page. For example, a value for
transactionIdwould not be available on the checkout page or review page before the purchase is completed.
How to Read the Information in the Data Layer in GTM
To access the dataLayer values in your GTM tags, you must create a new user-defined variable in your GTM account for each field you want to track. For more information, see User-defined variables.
ImportantWhen creating a new variable, be sure to select type Data Layer Variable in the Variable Configuration area.
ExampleThe following user-defined variable is called
cleverbridgeTransactionId. If the variable is used, the user is able track the value oftransactionIdin thedataLayer.
To track the variable in GTM tags, the user inserts {{cleverbridgeTransactionId}}.
Events and the Cleverbridge data Layer
In certain situations, events containing additional data are added to the dataLayer. You can use these event occurrences as GTM tag triggers. Currently, the following events are available for GTM integration:
cartOpen example
This event is triggered when the customer enters the checkout process for the first time.
dataLayer.push({
  'event': 'cartOpen',
  'ecommerce': {
    'currencyCode': 'EUR',
    'add': {
      'actionField': {
        'affiliation': 'cleverbridge',
        'step': 1
      }
      'products': [ {
        'id': '2417',
        'name': 'Anti-Malware+%5b2+Years%5d',
        'price': '53.95',
        'brand': 'brandValue',
        'category': 'categoryValue',
        'variant': 'variantValue',
        'quantity': 1,
        'list': 'listName'
      }],
      'impressions': [ {
        'id': "71028",
        'name': "Recommended Professional",
        'price': "12.95",
        'category': "Consumer Support",
        'variant': "variantValue",
        'position': 1,
        'list': "listName"
      }]
    }
  }
});
checkout example
This event is triggered when the customer continues in the checkout process.
dataLayer.push({
  'event': 'checkout',
  'ecommerce': {
    'currencyCode': 'EUR',
    'checkout': {
      'actionField': {
        'step': 1
      },
      'products': [ {
        'id': '2417',
        'name': 'Anti-Malware+%5b2+Years%5d',
        'price': '53.95',
        'brand': 'brandValue',
        'category': 'categoryValue',
        'variant': 'variantValue',
        'quantity': 1,
        'list': 'listName'
      }],
      'impressions': [ {
        'id': "71028",
        'name': "Recommended Professional",
        'price': "12.95",
        'category': "Consumer Support",
        'variant': "variantValue",
        'position': 1,
        'list': "listName"
      }]
    }
  }
});
NoteThe field
stepindicates the step of the checkout process where the customer is currently active. Depending on your design and region, your checkout process may contain multiple steps (cart page, billing details, review page, etc.).
removeFromCart example
This event is triggered when a customer removes a product from the cart. The event occurs as soon as the customer clicks the Remove button and before the page reloads.
dataLayer.push({
  'event': 'removeFromCart',
  'ecommerce': {
    'currencyCode': 'EUR',
    'remove': {
      'actionField': {
      'list': 'listName',
    },
    'products': [ {
      'id': '2417',
      'name': 'Anti-Malware+%5b2+Years%5d',
      'price': '53.95',
      'brand': 'brandValue',
      'category': 'categoryValue',
      'variant': 'variantValue',
      'quantity': 1,
      'list': 'listName'
    }]
  }
});
addToCart example
This event is triggered when a customer adds a recommended product to the cart. This occurs as soon as the customer clicks the Add button and before the page reloads.
dataLayer.push({
  'event': 'addToCart',
  'ecommerce': {
    'currencyCode': 'EUR',
    'add': {
      'actionField': {
        'list': 'listName',
      },
      'products': [ {
        'id': '2417',
        'name': 'Anti-Malware+%5b2+Years%5d',
        'price': '53.95',
        'brand': 'brandValue',
        'category': 'categoryValue',
        'variant': 'variantValue',
        'quantity': 1,
        'list': 'listName'
      }]
    }
  }
});
submitOrder example
This event is triggered when the customer clicks the Buy Now button. It occurs as soon as the customer clicks the button and before the page reloads.
dataLayer.push({
  'event': 'submitOrder',
  'paymentMethod' : 'CCA_VIS'
});
NoteThe fact that this event is triggered does not automatically mean that the customer order has been accepted. It is possible that the customer must first correct some validation errors before submitting again.
purchase example
This event is triggered when an order is submitted successfully, with or without payment, and the customer reaches the confirmation page.
dataLayer.push({
  'event' : 'purchase',
  'ecommerce': {
    'currencyCode': 'EUR',
    'purchase': {
      'actionField': {
      'id': '171513018',
      'affiliation': 'cleverbridge',
      'revenue': '53.95',
      'tax':'8.61',
      'shipping': '0',
      'coupon': ''
    },
      'products': [{
        'id': '2417',
        'name': 'Anti-Malware+%5b2+Years%5d',
        'price': '53.95',
        'brand': 'brandValue',
        'category': 'categoryValue',
        'variant': 'variantValue',
        'quantity': 1,
        'list': 'listName'
      }]
    }
  }
});
NoteTo determine if the order was paid or unpaid, you can use the
dataLayervalue for thepaymentStatusfield, which can contain the following values:
paid-> the order was successfully paid
waiting for payment-> the customer chose an offline payment method (e.g. wire transfer) and is expected to wire the money soon
quote-> the customer generated a price quote request that can be turned into a paid order later
test purchase-> this was a test order using one of the Cleverbridge test credit cards
You can also gain additional insights by analyzing thedataLayerfieldcleverbridgePage. This can contain the following values on the confirmation page:
confirmation.reject-> the payment was rejected
confirmation.pending-> instant processing was not possible and the transaction is scheduled for processing as soon as possible
confirmation.successOfflinePayment-> same as paymentStatus = waiting for payment
confirmation.successInstantDelivery-> same as paymentStatus = paid
If the first payment attempt failed or was not processed instantly, Cleverbridge offers the customer a chance to choose a different payment option and try again. In this case, thedataLayerfieldcleverbridgePagecan contain the following status:
confirmationpp.reject-> the second payment attempt was rejected
confirmationpp.pending-> the transaction is scheduled for processing as soon as possible
confirmationpp.successInstantDelivery-> the second payment attempt was successful
confirmationpp.successOfflinePayment-> the second payment will be completed offline (e.g. wire transfer)
How to Trigger GTM tags with Events
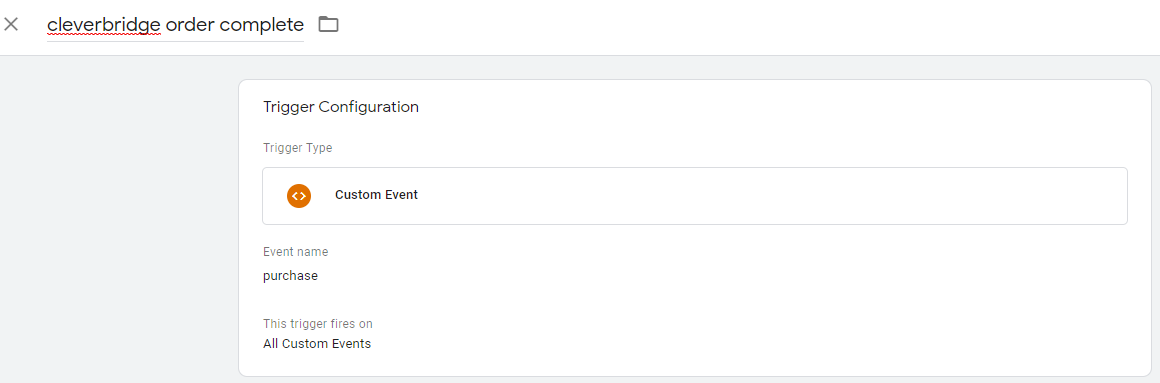
To only trigger a tag when a certain e-commerce event occurs, create a new GTM trigger with the type Custom Event. Under Event Name, add one of the events listed above. For more information, see Custom event trigger.
Example
The following is an example of a GTM trigger that only activates when a customer places a purchase.
If you have specific questions related to the Cleverbridge Google Tag Manager implementation, or if you want to implement a certain use case, contact our Tracking team at [email protected].
Updated 9 months ago