Add Product (Immediately)
Once a customer has had a pleasant experience with one of your products, you can often convince them to add additional items to their subscriptions, thereby increasing their overall value. To enable a customer to immediately add products to their subscriptions, integrate the following flow into your system:
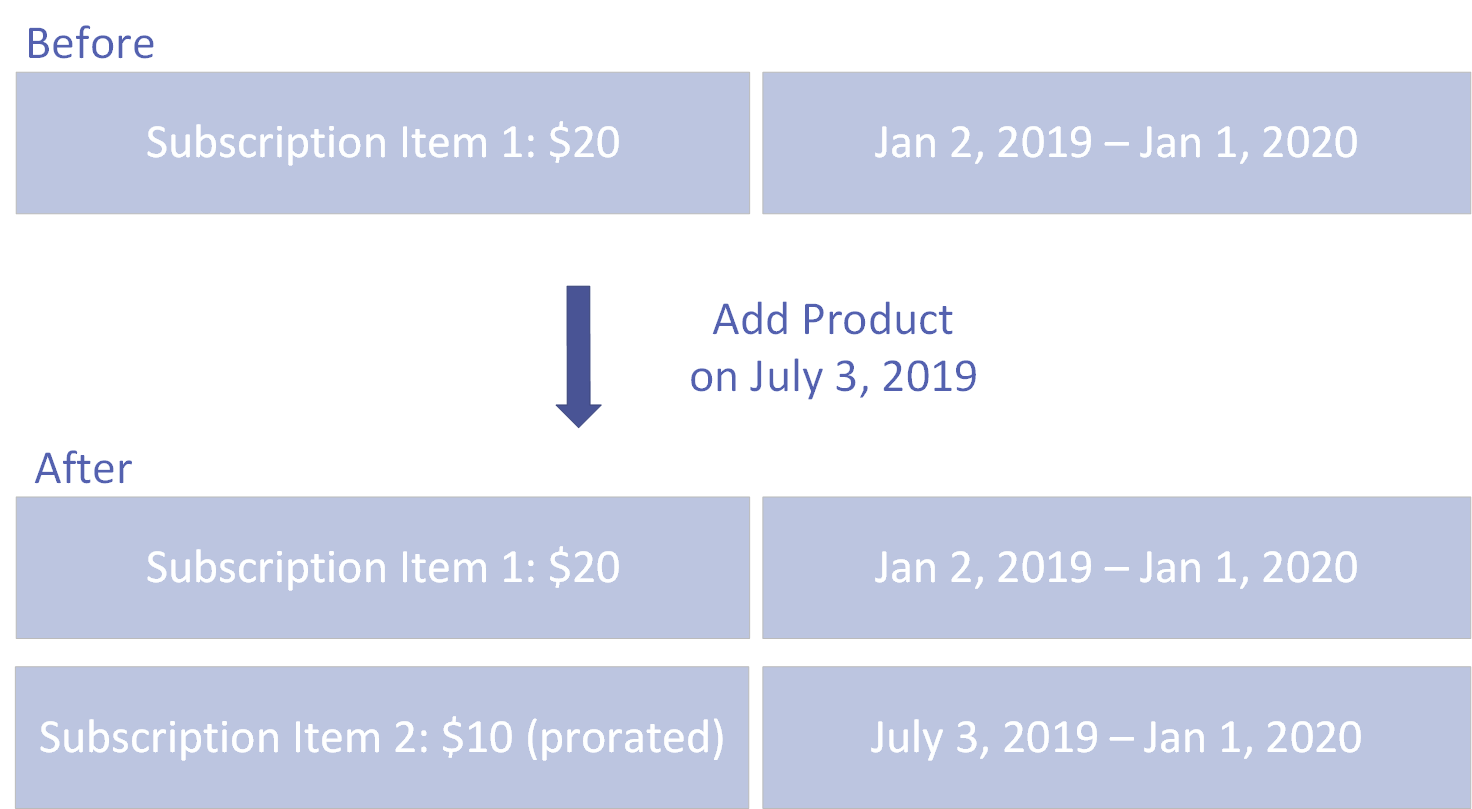
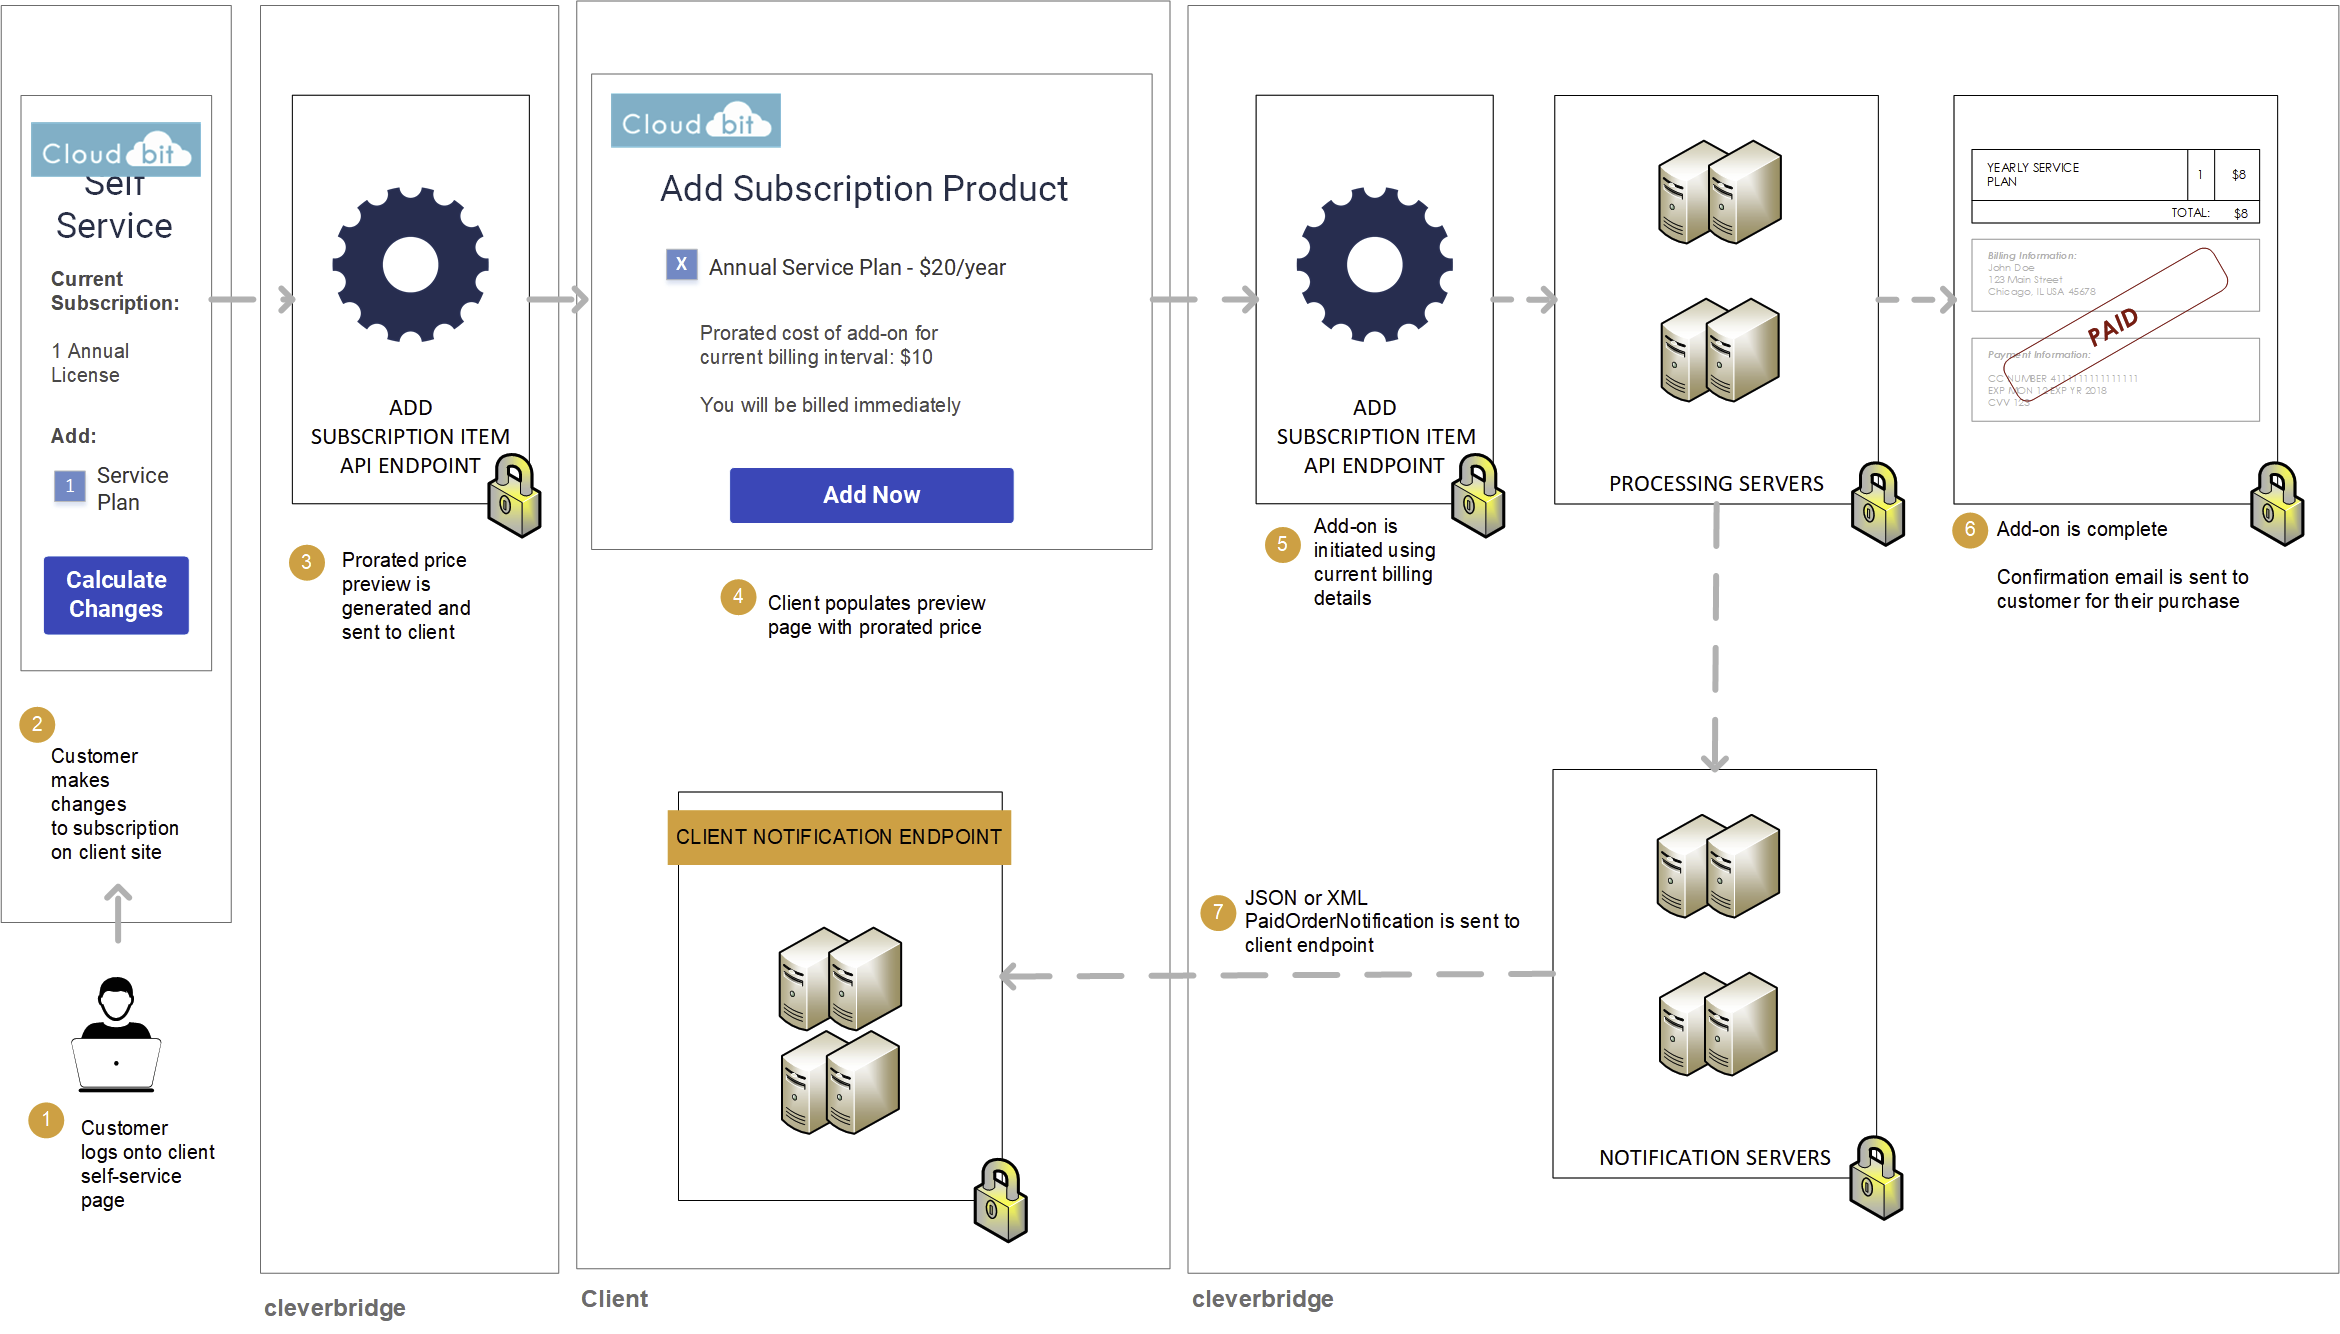
Step 1: Show customer price of add-on
If a customer would like to immediately add a product, call the Add Subscription Item API endpoint to generate the pro-rated price that the customer will pay for the new product for the remainder of the current billing interval. In the API call, do the following:
- Submit the
ProductIdthat belongs to the new product. - Set
AlignToCurrentIntervaltotruein theAlignmentSettingsargument to generate the pro-rated cost of the new product for the remainder of the current billing interval. - Set
GetCustomerPricePreviewOnlytotruein theAlignmentSettingsargument and setGenerateMailtofalseto generate a preview that will not be processed or communicated via email.
curl --request POST \
  --url https://rest.cleverbridge.com/subscription/addsubscriptionitem \
  --header 'accept: application/json' \
  --header 'content-type: application/json' \
  --header 'authorization: Basic xxxxxxxxxxxxxxxxxxxxxxxxxxxxxxxxxxxx' \
  --data '{
    "AlignmentSettings": {
      "AlignToCurrentInterval": true,
      "ExtendInterval": false,
      "GetCustomerPricePreviewOnly": true
    },
    "GenerateMail": false,
    "ProductId": 123456,
    "Quantity": 1,
    "SubscriptionId": "S12345678"
  }'
For more information about the AlignmentSettings argument, see Alignment Settings.
Step 2: Process add-on for customer
After the customer confirms the previewed price, set GetCustomerPricePreviewOnly to false in the AlignmentSettings argument and set GenerateMail to true. Call the Add Subscription Item API endpoint again. Cleverbridge will process the add-on using the payment details that we have stored in our database and send a confirmation email to the customer.
curl --request POST \
  --url https://rest.cleverbridge.com/subscription/addsubscriptionitem \
  --header 'accept: application/json' \
  --header 'content-type: application/json' \
  --header 'authorization: Basic xxxxxxxxxxxxxxxxxxxxxxxxxxxxxxxxxxxx' \
  --data '{
    "AlignmentSettings": {
      "AlignToCurrentInterval": true,
      "ExtendInterval": false,
      "GetCustomerPricePreviewOnly": false
    },
    "GenerateMail": true,
    "ProductId": 123456,
    "Quantity": 1,
    "SubscriptionId": "S12345678"
  }'
Step 3: Cleverbridge sends you a PaidOrderNotification
Cleverbridge sends you a PaidOrderNotification, which contains information that allows you to map the payment profile and update your local ecosystem (CRM, ERP, etc.). It includes:
| Parameter | Definition |
|---|---|
subscriptionID | The unique ID of the subscription in Cleverbridge. |
intervalNumber | The current billing interval, always the same as the previous billing interval since AlignToCurrentInterval was set to true. |
nextBillingDate | The date of the next billing cycle, always the same as the previous billing cycle since AlignToCurrentInterval was set to true. |
{
  "meta": {
    "type": "PaidOrderNotification",
    "date": "2019-03-19T14:47:34.857671",
    "schemaUrl": "https://www.cleverbridge.com/JsonNotificationSchemas/PaidOrderNotification"
  },
  "purchaseId": 123456789,
  ...
  "items": [{
    ...
    "recurringBilling": {
      "subscriptionId": "S12345678",
      ...
      "intervalNumber": 1,
      ...
      "nextBillingDate": "2020-01-01T12:59:59.111100",
      ...
    }],
  ...
  }
}