Reactivate Subscription
If a customer has deactivated a subscription, you can use a winback campaign to encourage this individual to resubscribe to your product. To enable customers to reactivate their subscriptions, integrate the following flow into your system:
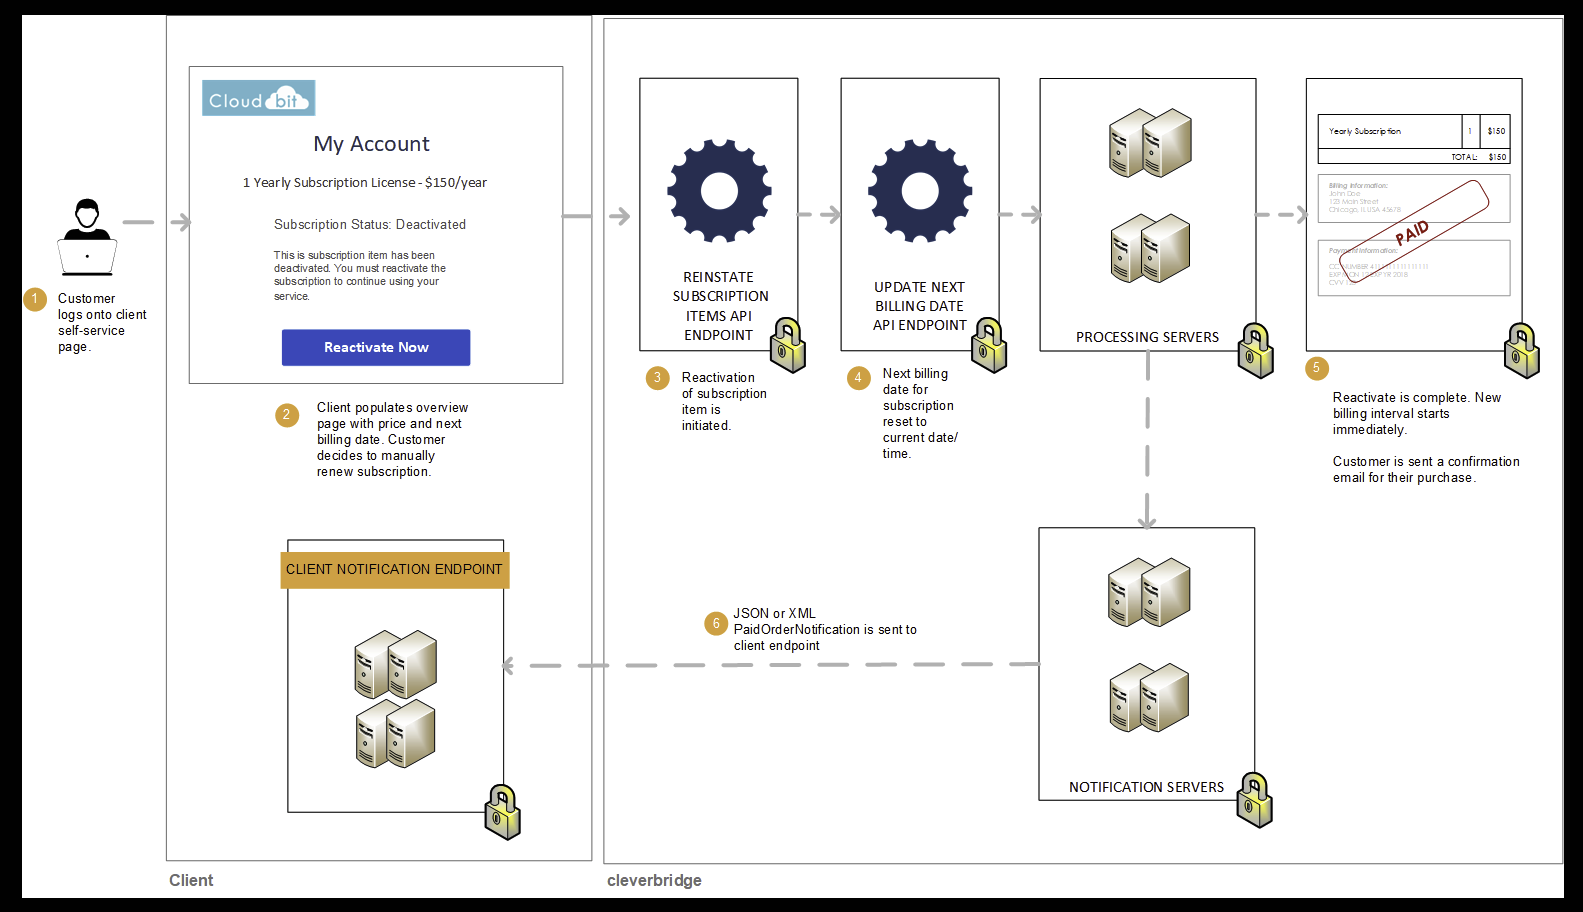
Step 1: Reactivate subscription item for customer
If a customer would like to reactivate a subscription, call the Reinstate Subscription Items API endpoint to reactivate the deactivated items in a subscription. In the API call, do the following:
-
Include the
SubscriptionIdpertaining to the customer's subscription. -
Set
GenerateMailtotrueso that the customer receives a confirmation email that their subscription item was reinstated. -
Add the subscription item running number of the deactivated subscription item to the
Itemsarray.curl --request POST --url <https://rest.cleverbridge.com/subscription/reinstatesubscriptionitems> --header 'accept: application/json' --header 'content-type: application/json' --header 'authorization: Basic xxxxxxxxxxxxxxxxxxxxxxxxxxxxxxxxxxxx' --data '{ "GenerateMail":true, "Items":[ 1 ], "SubscriptionId":"S12345678" }'
Step 2: Process the renewal for the customer
Call the Update Next Billing Date API endpoint to reset the NextBillingDate to the current date and time. This triggers an immediate transaction using the payment details that Cleverbridge has stored in our database.
curl --request POST \
  --url https://rest.cleverbridge.com/subscription/updatenextbillingdate \
  --header 'accept: application/json' \
  --header 'content-type: application/json' \
  --data '{
    "NextBillingDate":"2019-08-03T11:20:34.15Z",
    "SubscriptionId":"S12345678"
 }'
Step 3: Cleverbridge sends you a PaidOrderNotification
For more information, see Step 3: Cleverbridge sends you a PaidOrderNotification in Combine Upgrade with Early Renewal (Basic to Premium).